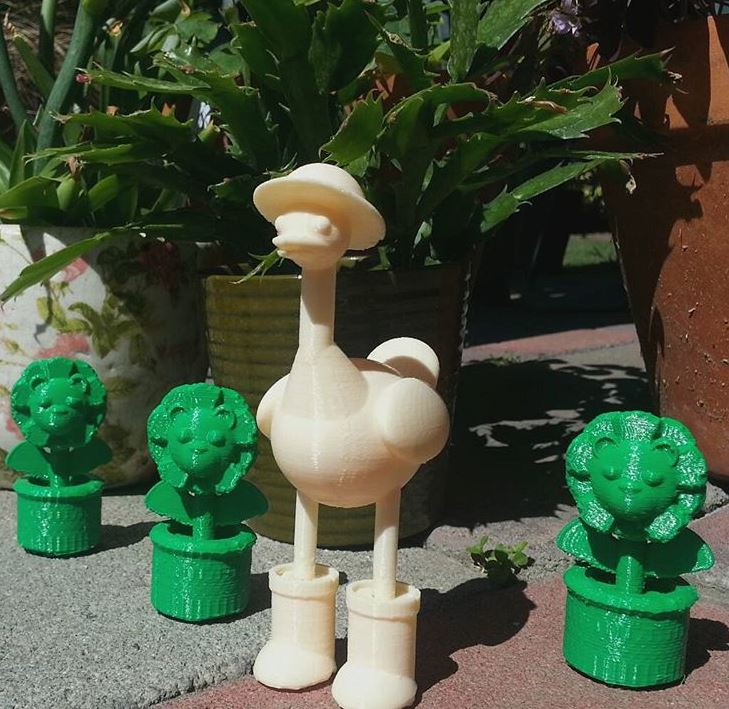
Friday, May 12, 2017

Digi Fab - Final Project (Public Art Piece Maquette)

Digi Fab - Final Project (Public Art Piece Maquette)


3D printed Duck and Dandy Lions for a Children's Museum and/or Garden.


 These sculptures would be cast out of bronze and be placed in a outdoor garden or park for children. The pieces will be large, approximately 10 feet high (Duck) and 8 feet high (Flowers). This will give a sense of whimsy and fantasy not only to the children but also the adults. I was inspired by the Children's Garden at The Huntington Library in Pasadena.

Children's Garden at The Huntington


First I modeled the characters in Meshmixer/Cinema 4D going off some doodles I made.


Doodles

Duck in hat and rain boots


3 Dandy Lions


I modeled one flower and then changed the expression slightly on each. There is a regular face, a sad face, and a grumpy face.

tool path with supports and raft


The most trouble I had was removing the supports. The duck stands on its own, but the legs broke when I was removing the supports, and I had to glue them back with plastic glue. Also the green filament I used for the flowers didn't lie down flat when building up the base so the bottoms of the pots are lumpy and rough.

printing


printing


I decided to do another 3D print for the final because I really enjoyed project #2 and love to see my doodles become 3D objects. I just wish the surface area was smoother and the supports were easier to remove without scratching and nicking it. I think as the technology progresses this will no longer be a problem in the future.


Digi Fab - Slotted Puzzle

Digi Fab - Slotted Puzzle


I made a tiger for this project. I started by modeling the tiger in Meshmixer and Cinema 4D.


I tired to keep the shapes very simple, because I didn't want 123 Make to get confused while slicing the model. (Sorry I forgot to take a screen shot at school of 123 Make)


Flat pieces generated by 123 Make.
I slanted the horizontal axis slightly to give it more interest.
1st Axis: 9 pieces
2nd Axis: 9 pieces


I imported the PDFs into AI and edited the lines to be read by the laser cutter. I added cut outs to mimic tiger stripes.


I cut 2 of each sheet in case pieces were lost, or I wanted to omit some and use doubles of another. I cut the pieces out of chip board (cardboard).


I had to watch the preview video (123 Make) as I was assembling it, because it got pretty confusing even though I only had around 50 pieces. A couple pieces need to be cut or trimmed in order to fit, because the slicing program didn't take into account nearby obstructing pieces. Also, I expected the slices to be symmetrical since the model was, however there were subtle differences in some of the pieces from left to right side. I used the duplicates I cut to even it out.


I enjoyed this assignment. I think that the 123 Make (Slicer) software is a good tool to use as a base that can be altered from as needed to fit various projects.

Wednesday, April 12, 2017

Digital Fab - 3D Print Project

3D Printed Cats

Final product

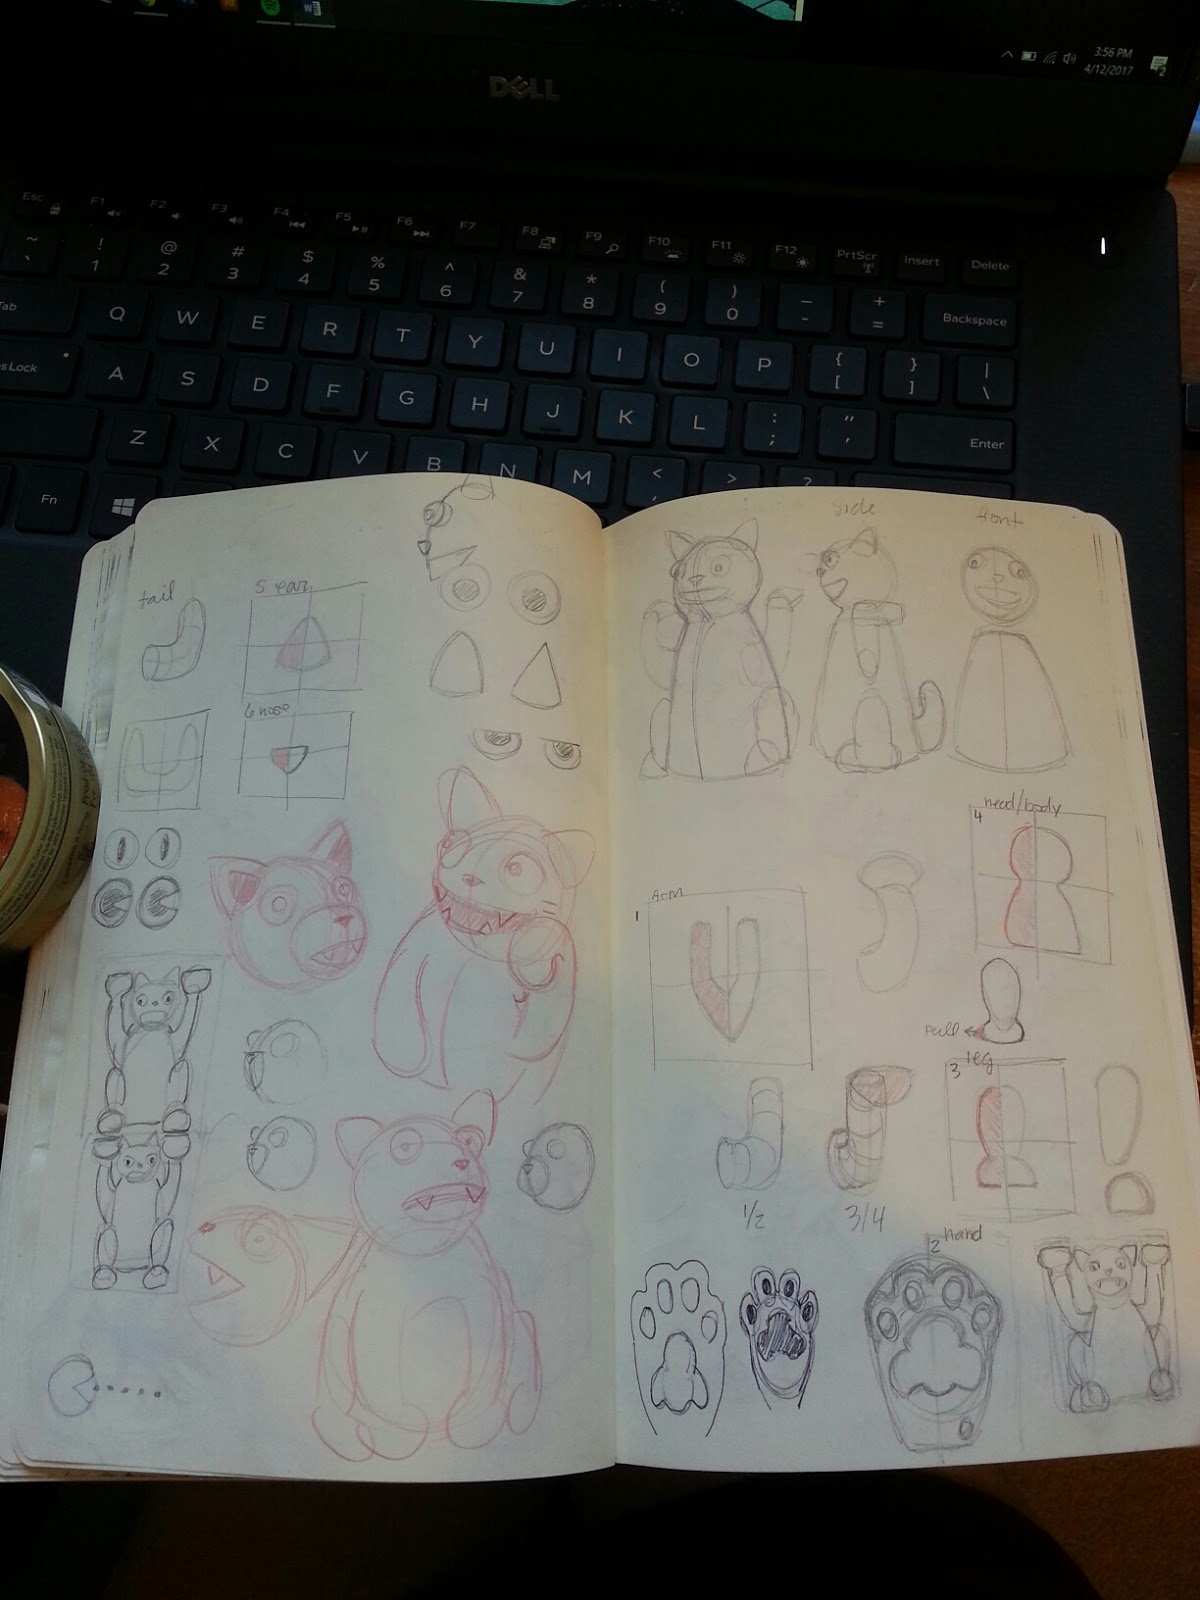
 I wanted to make my own digitally sculpted character, I chose a cat with a Pac-man like mouth. I drew some little sketches to plan out the shapes.

doodles and planning


First in Cinema 4D I drew custom splines and used nurbs to fill them out. I intended to create my own rough primitives that would act as building blocks for my basic cat shape. I used both the lath and sweep nurbs. 

lath nurb in Cinema 4D


I then imported these shapes to Meshmixer as STL files. Once in Meshmixer the program wasn’t recognizing the forms as solid shapes. After reading some blogs online, I tired selecting the whole item and extruding it uniformly (edit>extrude>direction tab>normal). This was only the case with items I used the lath nurb on, the sweep nurbs were fine.

left: inside-out, right: extruded to flip the right side out


Unfortunately most of the forms I made read as vase like with two shells instead of one, with a pinhole down the center. I couldn’t figure out how to fix them so I ended up making most of the shapes over again in Meshmixer by bending, stretching and squashing primitives.

Tools I used the most – transform, soft transform, Boolean union, Boolean difference, plane cut, mirror.  

Combined shapes ready to print in Meshmixer


I printed 2 small cats first ( ~ 1" X 1" X 1.5"), then 1 larger cat ( ~ 1.5" X 1.5" X 2").
Resolution was set on medium, 15% infill, PLA green glow-in-the-dark.
2 small cats = 54 min
1 larger cat = 1 hr 20 min

cats on printer bed


The supports and rafts were easy to remove except for the ones inside the mouth.

with supports and raft


I am very happy with the way them came out, I just wish there were a easier way to remove the mouth supports easier.

final


Friday, March 24, 2017

Digi-Fab 3D printed mini Bust with added object

3D printed mini bust with pumpkin hat


First I used the iPad scanning software to scan my head and shoulders. I then imported the file to Meshmixer. There I repaired holes in the mesh by dropping in primitive shapes and then combining the forms. 

Basic iPad scan with no changes


Small hole in the top of the head
small hole and large dent in
the neck behind the hair
primitives dropped in and smoothed over

 I also scanned a foreign object, the top of my Pumpkin juice bottle. I imported it to mesh mixer and combined it with my bust to make a pumpkin hat.

Original item scanned
Plain iPad scan


final form


I sent the file to Simplify 3D and prepared the file for print by scaling, adding supports and a raft. The print quality was set at medium and I scaled it to be roughly 1.5” X 1.5”. The infill was set at 15%. The run time was only 49 minutes. 

Nozzle path with supports and raft


I am pretty happy with the print, I had no issues with failures. However, the hole in my neck under my hair didn’t print smoothed over like I had hoped, I looks a little jumbled and confused in the nozzle path. Also, the bottom got stuck to my raft because I forgot to lift the figure and add small break away columns in Simplify 3D.

weird hole in neck

raft stuck to bottom

Digi-Fab: Frank Bros Exhibit at CSULB UAM

Frank Bros (The Story that Modernized Modern) Exhibit at CSULB UAM


This exhibit showcases furniture sold by The Frank Bros. Furniture store from 1938 – 1982, with an emphasis on Mid-century Modern designs. The Frank Bros. operated locally out of Long Beach and were dealers for many influential designers such as Eames, Knoll, and Aalto. Exhibited were selections of each designer’s work as well as a comprehensive timeline of the Family and business’s history.


While walking through the exhibit I recalled several movies who’s look was influenced by the Mid-century Modern design, some contemporary to that time and some more modern films nostalgic for the era.
The Incredibles (2004)

North by Northwest (1959)
A Clockwork Orange (1971)
I particularly enjoyed the small section of children’s toys. The simple designs and slotted cards were helpful in thinking about construction and three-dimensional design for our digital fabrication class.